Shoppers give your booth about 2 seconds. Spend them on this.
I’ve run a booth at an antique mall for more than five years, and I’ve spent a lot of that time watching people walk the aisle. In that two-second blink, they’re checking three things:
Does something stop my feet? A bold color, a big piece, a weird little treasure.
Is there a way in? An opening and a path, not a wall of stuff.
What’s the vibe? Shoppers decide almost instantly whether a booth is “for them.”
None of those checks has anything to do with how much inventory you own. That’s why I treat display as a sales tool, not decoration. The 15 ideas below are the ones I keep coming back to, grouped by the job each one does, along with the reason it works on a shopper’s brain.
My own approach has always been to keep it simple and make it make sense. Put similar objects or colors together, or set a piece up the way it’s actually meant to be used, so a shopper can picture it in their home without having to think. It sounds almost too basic, but it makes a huge difference.
Stop Them in the Aisle
1. Lead With One Hero Piece
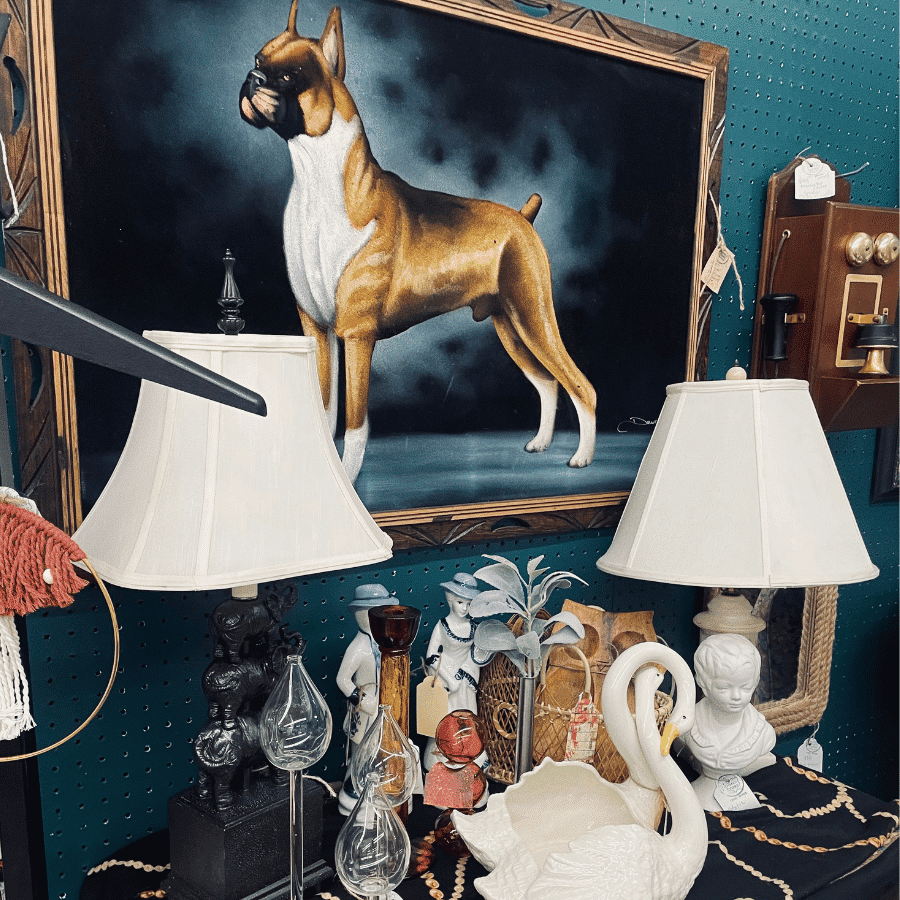
Give the eye a place to land first: a big piece, a tall lamp, an oversized sign, a statement chair. When everything competes, nothing wins, and a shopper’s scan has no anchor to grab. Your hero piece doesn’t have to be the most expensive thing in the booth. It just has to be the one that makes someone stop and say “oh.”
I was so sad when this velvet painting sold! It was huge and eye catching!
2. Repeat One Bold Color
Our eyes hunt for patterns, and one repeated color reads as a signal in a busy aisle. Pick a strong hue and use it in three or four places: a painted crate, a throw, a tag, a sign. Three touches feels intentional instead of random. Go much past that and the booth starts looking like a theme party.
3. Change Height Every Couple of Feet
A flat shelf line flattens attention. Risers, stacked books, crates turned on end, and one hanging piece break up the line and create rhythm. Height also lets shoppers see more from farther away, which gets them walking toward your booth before they’ve read a single tag.
Learning the art of stacking is vital in the vintage booth world. We are limited on space, but not height. Use all the space you have, and see how high you can go. Safely, of course.
Give Them a Way In
4. Open the Front
A solid front wall says “you’re not invited.” Keep the aisle edge low, light, or partly open, because shoppers read an opening as permission. This matters more than anything behind it. The back of your booth can’t sell to someone who never crossed the threshold.
5. Build a Path That Pulls People In
Once you have an opening, give the eye a route. A rug edge, a low table, a run of crates, or a small sign can act like a trail. Put something worth the walk a few steps in, not tucked in a back corner. The goal is to make that second step feel obvious and safe, because shoppers rarely go deep into a booth they can’t scan from the aisle.
Set the Vibe
6. Style Vignettes, Not Rows
A row of similar items looks like inventory. A grouping looks like life. A coffee pot, two cups, and a folded cloth tell a story in one glance. Rows also push shoppers into comparing, which slows decisions down. A vignette lets them picture the piece in their own home.
7. Group the Booth by Story, Not Category
Now zoom out from single vignettes to the whole booth. Instead of a shelf of all kitchenware, build a camping corner, a bar cart moment, a picnic setup. Story zones pull shoppers across categories they didn’t come in for, and that’s where add-on sales come from. Someone arrives looking for a bowl and leaves with a thermos because the thermos belonged to the scene.
8. Add Texture With Soft Goods
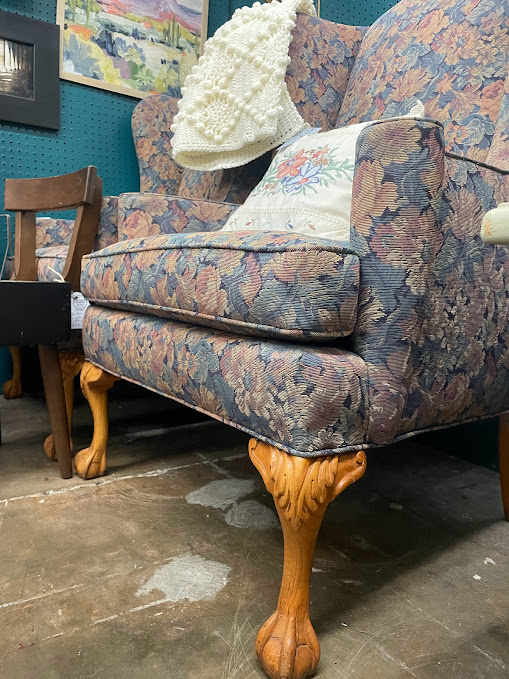
Antiques are mostly hard surfaces: glass, wood, iron, ceramic. A quilt, a linen runner, a basket, or a woven rug softens the space and makes it feel like a room instead of a shelf. Bonus: soft goods are an easy way to hide the less pretty parts of your fixtures.
9. Leave Negative Space Around Good Items
Empty space is a frame. Crowding every surface makes even great inventory feel like clutter, and clutter reads as cheap. I’d rather show 20 pieces well than 40 badly, because a jammed booth hides the very items that were supposed to cover rent that month.
I’m guilty of overbuying! And, of course, I want to put everything in the booth. But, sadly it doesn’t all work together. Sometimes I have to take a few steps back and remove the items that don’t work together. They may fit somewhere else or they may just have to appear later.
10. Light It Within Your Mall’s Rules
Lighting changes how a piece reads, especially metal, glass, and dark wood. Check your mall’s rules before you buy anything, since policies vary. If plug-in lighting is allowed, a small lamp or clip light can rescue a dark corner. If it isn’t, put your brightest inventory where the aisle light already falls.
Help Them Buy
11. Put the Best Item at Eye Level
Your most wanted piece belongs where a shopper’s gaze naturally lands, not down by their ankles or way above their head. Use high spots for atmosphere and low spots for texture and bulk. When an eye-level piece sells, fill the spot with the next best thing right away instead of leaving a hole.
12. Price Everything, Visibly
An unmarked item creates a small social problem: the shopper has to ask, and plenty won’t. Tag every piece or use a clear sign. Group pricing on a basket of smalls keeps things readable without tagging each one. Clear tags also keep checkout from turning into a guessing game.
13. Use Signs That Answer Real Questions
Good signs don’t describe the item. They answer what the shopper is already wondering. What era is it? What’s it for? Is it a reproduction? Does the shade come with the lamp? A small card does the job of a salesperson who isn’t standing there, and it makes browsing feel easy.
Bring Them Back
14. Refresh the Front Edge on a Schedule
The front foot of your booth is your billboard, and repeat shoppers stop seeing it. Rotate that zone with the seasons and with whatever’s moving right now, so your regulars have a reason to look again.
I refresh weekly with the main spot in the first few feet getting a seasonal update.
15. Make One Spot Worth Photographing
Shoppers photograph booths that look good, and those photos travel. Build one deliberate moment: a chair with a hat and a bag, or a stack of crates topped with a lamp. Keep your tags, cards, and signs visually consistent so the photo carries your booth’s personality. That’s your branding at work, and it keeps selling after the shopper walks away.
How to Test These Without Guessing
You don’t need a research budget, just one change at a time. Pick a single idea, like the hero piece or the open front, run it for a few weeks, and keep a simple log of what sold and what got picked up and put back down. Change too much at once and you’ll never know what helped.
Track sales by category and price point instead of going on gut feel. Give it a couple of months and your own booth will tell you what works better than any list can.
Frequently Asked Questions
What makes a successful vendor booth display?
Start with one focal piece, one repeated color, and an open front that invites people in. Style small groupings instead of rows, vary the height every couple of feet, and put your best item at eye level with breathing room around it. Price everything clearly so nobody has to ask.
Do antique booths make money?
They can, but it comes down to four numbers: your rent, what you pay for inventory, how you price, and how fast things turn. Be wary of anyone promising easy profit. Track your numbers monthly and let the log tell you the truth.
How big is a vendor booth?
It depends on the mall. I started small and moved up to a bigger size (12×10) eventually. Before you buy a single fixture, ask the manager for exact dimensions, wall rules, and lighting policy, then design for the space you’re actually renting.
How do I get shoppers to come farther into my booth?
Ideas #4 and #5 cover this, but here’s the short version: give them an opening, a path, and a reason. Keep the front edge low or partly clear, lay a visual trail, and place something worth the walk a few steps in.
Want more help turning browsers into buyers? Join our vibrant community on Facebook! Click here.
Walk into most antique malls and you can spot the new vendor from the entrance. Their space is one big open rectangle with a table in the middle, a rack in the corner, and merchandise spread thin across every square foot. Shoppers stroll right past, because nothing stops them, nothing frames the view, and nothing…
Boost your vintage booth sales with effective display strategies for every season. Practical merchandising tips, layout ideas, and proven techniques from real booth experience.
Transform your antique booth into a holiday destination with our vintage Christmas display guide. Get theme ideas, layout tips, and proven selling strategies for maximum sales.
Is your booth being overlooked? You’ve got the goods, but maybe not the layout. If you want to stop shoppers in their tracks and encourage them to buy, your booth setup might need a refresh. Our friends at Rhynes Wholesale gave us 5 incredible tips that will help boost your booth sales! Whether you’re running…